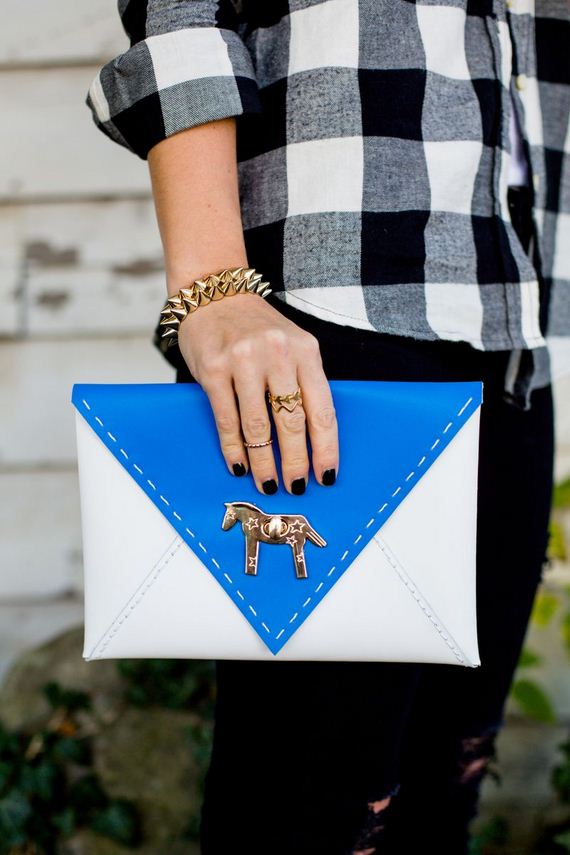
I have to admit that I am totally that girl who carries around a giant purse that is always stuffed to the brim with everything you could possibly imagine. As much as I like feeling like I’m prepared for whatever situation may come about, it’s such a freeing feeling when we have a date night and I choose to take a small clutch out on the town instead. It feels so light and dainty in comparison to my heavy-duty everyday bag. I thought it would be fun to make an envelope-style clutch with a colorblock element that I could use for date nights and dress down for weekday use as well. It’s a beginner project, so if you’ve never ventured into bag-making before, this project is a great one to start with!
Supplies:
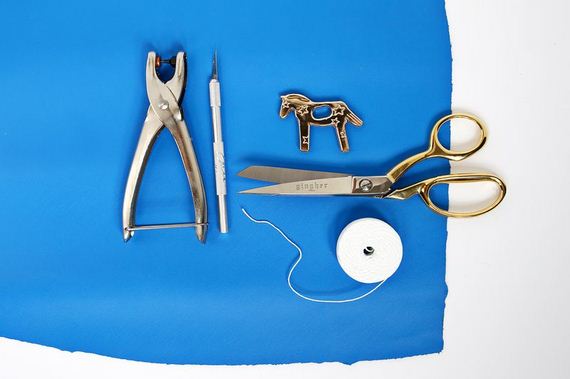
-2 colors of real or faux leather of medium stiffness (one for the body of the clutch and one for the flap)
– Download ABM Clutch Template (right click to download)
-hole punch pliers
-X-Acto knife (or rotary cutter), metal ruler, and cutting mat
-waxed thread
-yarn needle
-small binder clamps
-twist-lock purse lock (I used this adorable pony one!)
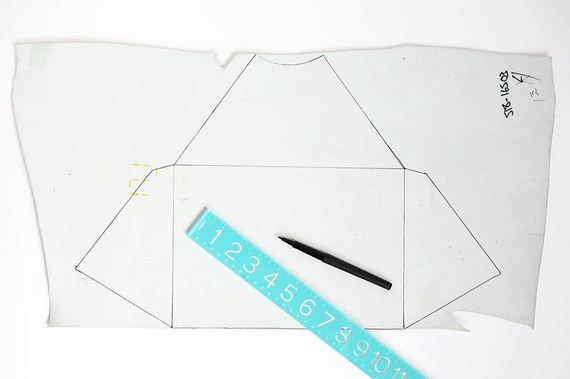
Print, assemble, and cut out your paper clutch template. Trace the appropriate template (either the main body section or the top flap) onto the wrong side of each of your colors of leather.
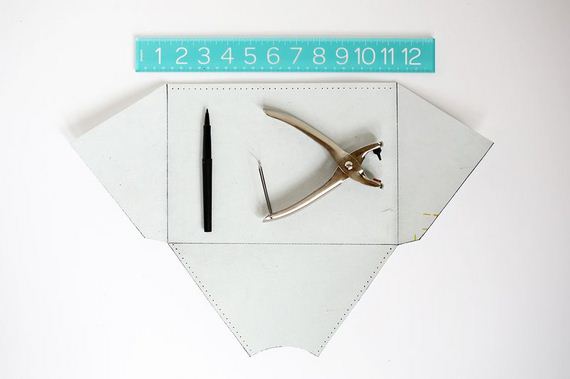
Use your X-Acto knife and/or rotary cutter to cut out the main body section and top flap from the two templates. On the main body section of leather, mark a dot every 1/4″ on both the top edge and along the left and right sides of the bottom flap. Use your hole punch pliers to punch a hole in each marked spot.
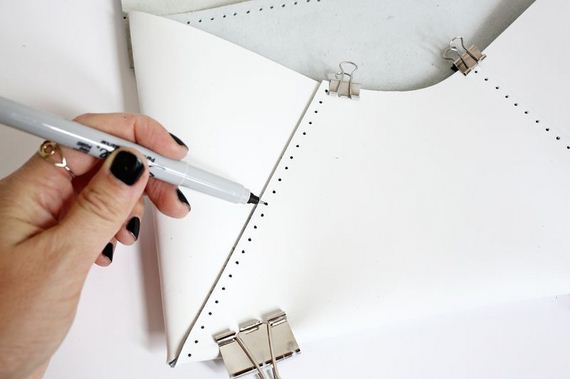
Fold the two side flaps inward and fold the bottom flap upwards on top of the side flaps. Use the binder clips to hold the flaps in place. Stick a pen or thin marker through each punched hole on your bottom flap so that it makes a corresponding mark on the side flap underneath it. Unfold the sections and use the hole punch to punch those marked holes as well. Repeat the process with the top flap that is cut from your other color of leather and the holes punched across the top of your main body section (the template shows where they should line up).
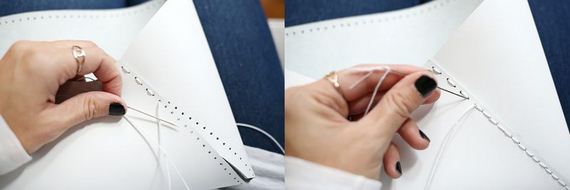
To sew your sections together, thread a medium-sized yarn needle with the waxed thread, make a knot at the tail of your thread, and begin to sew through the holes. To create a continuous sewn line without any gaps, just sew back through the opposite holes again once you reach the end. Knot the thread on the inside of the clutch and trim the excess. Repeat process on the opposite side of the main body and on the top to connect the top flap to the main body section.
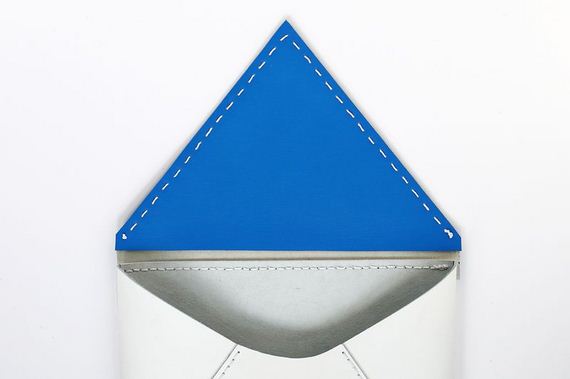
If you want to add an extra finish to the inside of your clutch, cut out another top flap template that is 1″ shorter on the bottom than the original top flap. Line the two flaps up with each other (wrong sides together), mark and punch 1/4″ holes along the edge, and sew them together. This gives you an extra sturdy top flap, brings a pop of color to the inside, and adds a nice stitching detail. I didn’t backtrack once I reached the end on this stitching detail because I liked the look of the gaps between each stitch. Of course you can add the stitching detail even if you don’t add a second layer to the top flap, so keep that in mind.
Now that your clutch is assembled you can install your twist-lock purse lock on the top flap and on the front of the main body section underneath it. Each purse lock will install a little differently depending on the design, but you should only need an X-Acto knife to cut holes or notches in the correct spots and maybe a small screwdriver, depending on the type. There are lots of styles out there to choose from!
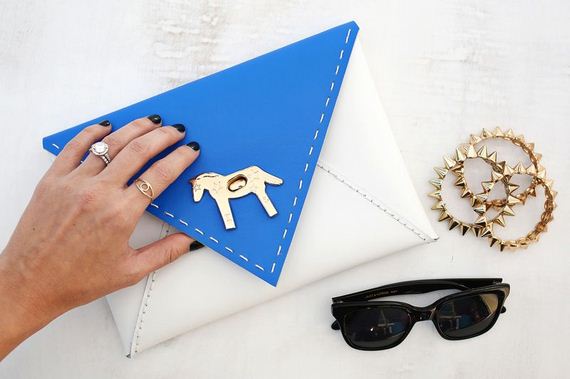
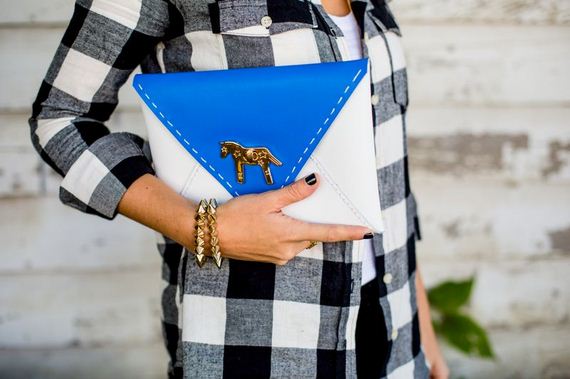
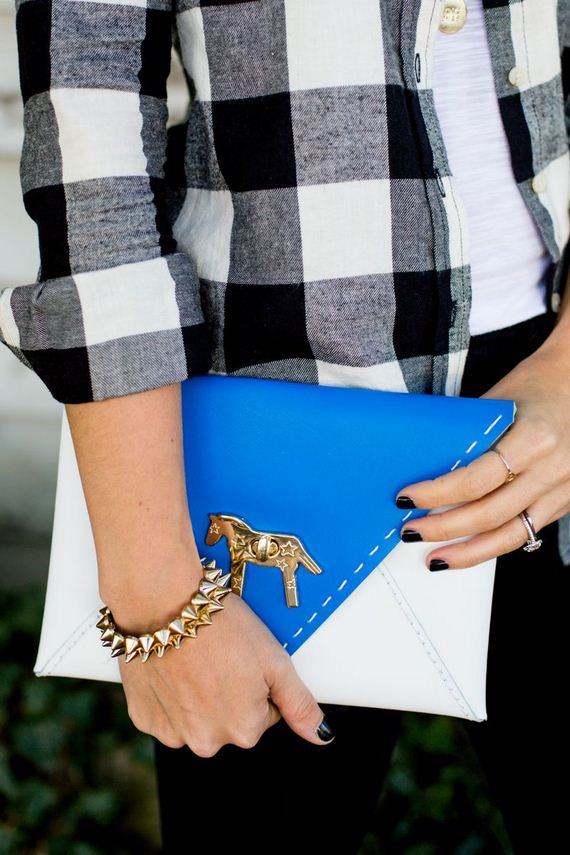
Isn’t that little gold pony closure just the cutest? I think this clutch is perfect because it’s not too dressy, so you could wear it during the day with jeans, but the gold detail adds enough glamour for an evening out as well. Of course, you could use metallic leather instead if you wanted it to go even dressier. What do you think? Are you up for giving bag-making a try? xo. Laura